-
Notifications
You must be signed in to change notification settings - Fork 189
OpenIoT Virtual Box Image Documentation
- Oracle Virtual Box available from Oracle VM VirtualBox
- OpenIoT Virtual Box Image available from TBA
- Recommended Configuration for Virtual Box (tested with below configuration for stable working)
- 2 GB Memory
- 12 GB HDD (6 GB Linux, 3.5 GB Data expandable to 5.5GB using GParted tool for Ubuntu, 2 GB Swap)
- Two core processing
- Install the oracle virtual box
- From the location where the VM is stored, double click the file OpenIoT-VM.vbox. A window as show below will open with the OpenIoT-VM settings
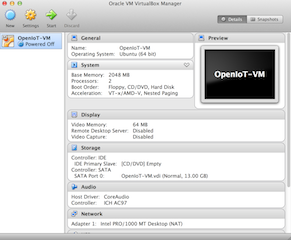
- Click the Start icon to start the VM.
- The username and password for the VM is located in a instruction.txt file in the downloaded VM Image package.
- The scripts required to run the OpenIoT services namely Scheduler, SDUM, Request Definition, Request Presentation, LSM Server, xGSN and Virtuoso are located in the Desktop under scripts directory
An openiot.propoerties file located in JBOSS configuration folder /media/openiot/OpenIoT-Dev-Environment/jboss-as-7.1.1.Final/standalone/configuration provides the configuration information to OpenIoT services.
- The OpenIoT VM determined by the openiot-properties can be deployed in the following run-time configurations
- Run all components locally
- Use an existing installation of virtuoso and LSM-Server running on DERI's infrastructure
Note 1: By using DERI's infrastructure, the OpenIoT Platform will have access to public data pushed by other OpenIoT users to DERI's server.
Note 2: A local installation is suitable for users who intend to use OpenIoT services within the organisation's network providing complete control over sharing of data to external users.
#Scheduler Properties

scheduler.core.lsm.openiotMetaGraph=http://openiot.eu/OpenIoT/sensormeta#
scheduler.core.lsm.openiotDataGraph=http://openiot.eu/OpenIoT/sensordata#
scheduler.core.lsm.openiotFunctionalGraph=http://openiot.eu/OpenIoT/functionaldata#
scheduler.core.lsm.access.username=openiot_guest
scheduler.core.lsm.access.password=openiot
scheduler.core.lsm.sparql.endpoint=http://localhost:8890/sparql
scheduler.core.lsm.remote.server=http://localhost:8080/lsm-light.server/

#Service Delivery & Utility Manager (SD&UM) Properties

sdum.core.lsm.openiotFunctionalGraph=http://openiot.eu/OpenIoT/functionaldata#
sdum.core.lsm.sparql.endpoint=http://localhost:8890/sparql
sdum.core.lsm.remote.server=http://localhost:8080/lsm-light.server/

#Request Definition

#Request Presentation

#LSM-LIGHT Properties
lsm-light.server.connection.driver_class=virtuoso.jdbc4.Driver
lsm-light.server.connection.url=jdbc:virtuoso://localhost:1111/log_enable=2

lsm-light.server.connection.username=dba
lsm-light.server.connection.password=dba
lsm-light.server.minConnection=10
lsm-light.server.maxConnection=15
lsm-light.server.acquireRetryAttempts=5

#for local virtuoso instance
lsm-light.server.localMetaGraph = http://openiot.eu/OpenIoT/sensormeta#
lsm-light.server.localDataGraph = http://openiot.eu/OpenIoT/sensordata#
#Scheduler Properties

scheduler.core.lsm.openiotMetaGraph=http://lsm.deri.ie/OpenIoT/guest/sensormeta#
scheduler.core.lsm.openiotDataGraph=http://lsm.deri.ie/OpenIoT/guest/sensordata#
scheduler.core.lsm.openiotFunctionalGraph=http://lsm.deri.ie/OpenIoT/testSchema#
scheduler.core.lsm.access.username=openiot_guest
scheduler.core.lsm.access.password=openiot
scheduler.core.lsm.sparql.endpoint=http://lsm.deri.ie/sparql
scheduler.core.lsm.remote.server=http://lsm.deri.ie/lsm-light.server/

#Service Delivery & Utility Manager (SD&UM) Properties

sdum.core.lsm.openiotFunctionalGraph=http://lsm.deri.ie/OpenIoT/testSchema#
sdum.core.lsm.sparql.endpoint=http://lsm.deri.ie/sparql
sdum.core.lsm.remote.server=http://lsm.deri.ie/lsm-light.server/

#Request Definition

#Request Presentation

#LSM-LIGHT Properties
lsm-light.server.connection.driver_class=virtuoso.jdbc4.Driver
lsm-light.server.connection.url=jdbc:virtuoso://lsm.deri.ie:1111/log_enable=2
lsm-light.server.connection.username=<database username>
lsm-light.server.connection.password=<database password>
lsm-light.server.minConnection=10
lsm-light.server.maxConnection=15
lsm-light.server.acquireRetryAttempts=5

#for local virtuoso instance
lsm-light.server.localMetaGraph = http://lsm.deri.ie/OpenIoT/guest/sensormeta#
lsm-light.server.localDataGraph = http://lsm.deri.ie/OpenIoT/guest/sensordata#
For an end-user who would like to use the platform as-is, perform the following steps
- Make a choice for a local deployment or DERI infrastructure based deployement
- Based on step 1 choice, navigate to the folder
/media/openiot/OpenIoT-Dev-Environment/jboss-as-7.1.1.Final/standalone/configuration
- Rename the openiot.properties.local file to openiot.properties if you choose a local setup
- Rename the openiot..properties.deri filr to openiot.properties if you choose a DERI's based setup
- Open a terminal and navigate to
/home/openiot/Desktop/scripts - Starting Virtuoso
- Run the script
./virtuoso_start - You will see the output as below
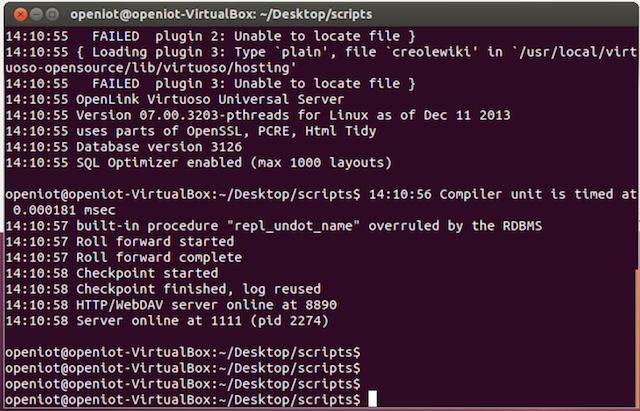
- Starting JBOSS
- Run the script
./jboss_start - You will see the output as below
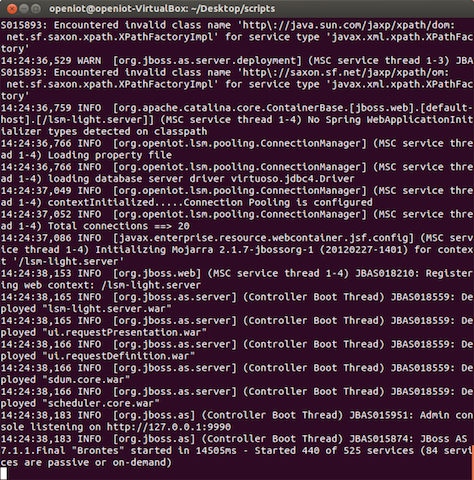
- Note: If you start JBOSS without performing step 2, JBOSS will throw exceptions.
- Starting xGSN to push data into the OpenIoT system.
- A virtual sensor is used to configure xGSN with appropriate data sources. Please refer to the wiki page for more details
- Depending on your choice in step 2, navigate to the location
/media/openiot/OpenIoT-Dev-Environment/develop-code-mar2014/openiot/modules/x-gsn/virtual-sensors- There are two folders namely local-install and deri-install
- Copy the files in from the directory that corresponds to your setup (Step 2) to the main virtual-sensors directory
- These files contain the virtual sensor configuration and the corresponding metadata that describe the sensor. The sample file description are
- Local instance: A weather station sensor located in canberra, australia. The data for the sensor is read from a CSV file stored in xGSN folder under
data - DERI instance: A weather station sensor located in Lausanne, Switzerland. The data for this sensor is read from a CSV file stored in the xGSN folder under
data
- Local instance: A weather station sensor located in canberra, australia. The data for the sensor is read from a CSV file stored in xGSN folder under
Note 1: To push xGSN data to a local instance, update the configuration file in the '/conf/lsm_config.properties' with following
username=sofiane
password=sofiane
metaGraph=http://openiot.eu/OpenIoT/sensormeta#
dataGraph=http://openiot.eu/OpenIoT/sensordata#
lsm.server=http://localhost:8080/lsm-light.server/

#DynamicControl
functionalGraph=http://openiot.eu/OpenIoT/functionaldata#
endPoint=http://localhost:8890/sparql
virtualSensorsDir = virtual-sensors
availableSensorsDir = virtual-sensors/LSM
dynamicControl=false
#enter frequency of dynamic sensor control in minutes
dynamicControlPeriod=5
Note 2: To push xGSN data to a DERI instance, update the configuration file in the '/conf/lsm_config.properties' with following
username=sofiane
password=sofiane
metaGraph=http://lsm.deri.ie/OpenIoT/guest/sensormeta#
dataGraph=http://lsm.deri.ie/OpenIoT/guest/sensordata#
lsm.server=http://lsm.deri.ie/lsm-light.server/

#DynamicControl
functionalGraph=http://lsm.deri.ie/OpenIoT/guest/functionaldata#
endPoint=http://lsm.deri.ie/sparql
virtualSensorsDir = virtual-sensors
availableSensorsDir = virtual-sensors/LSM
dynamicControl=false
#enter frequency of dynamic sensor control in minutes
dynamicControlPeriod=5
- Open a new terminal instance
- Go to
/home/openiot/Desktop/scripts - Run the script
./gsn_start.sh - You will see the output as below

- Note: If you run step 6 without completing previous steps, you will see exceptions and errors. Please ensure the previous steps are completed without any errors.
- Composing a service using OpenIoT
-
For documentation on composing a service using OpenIoT tools, please refer to the following link Request Definition and Request Presentation
-
Request Definition
- Open firefox browser
- Enter the URL `http:\localhost:8080\ui.requestDefinition
- Create an account and sign-in with the same
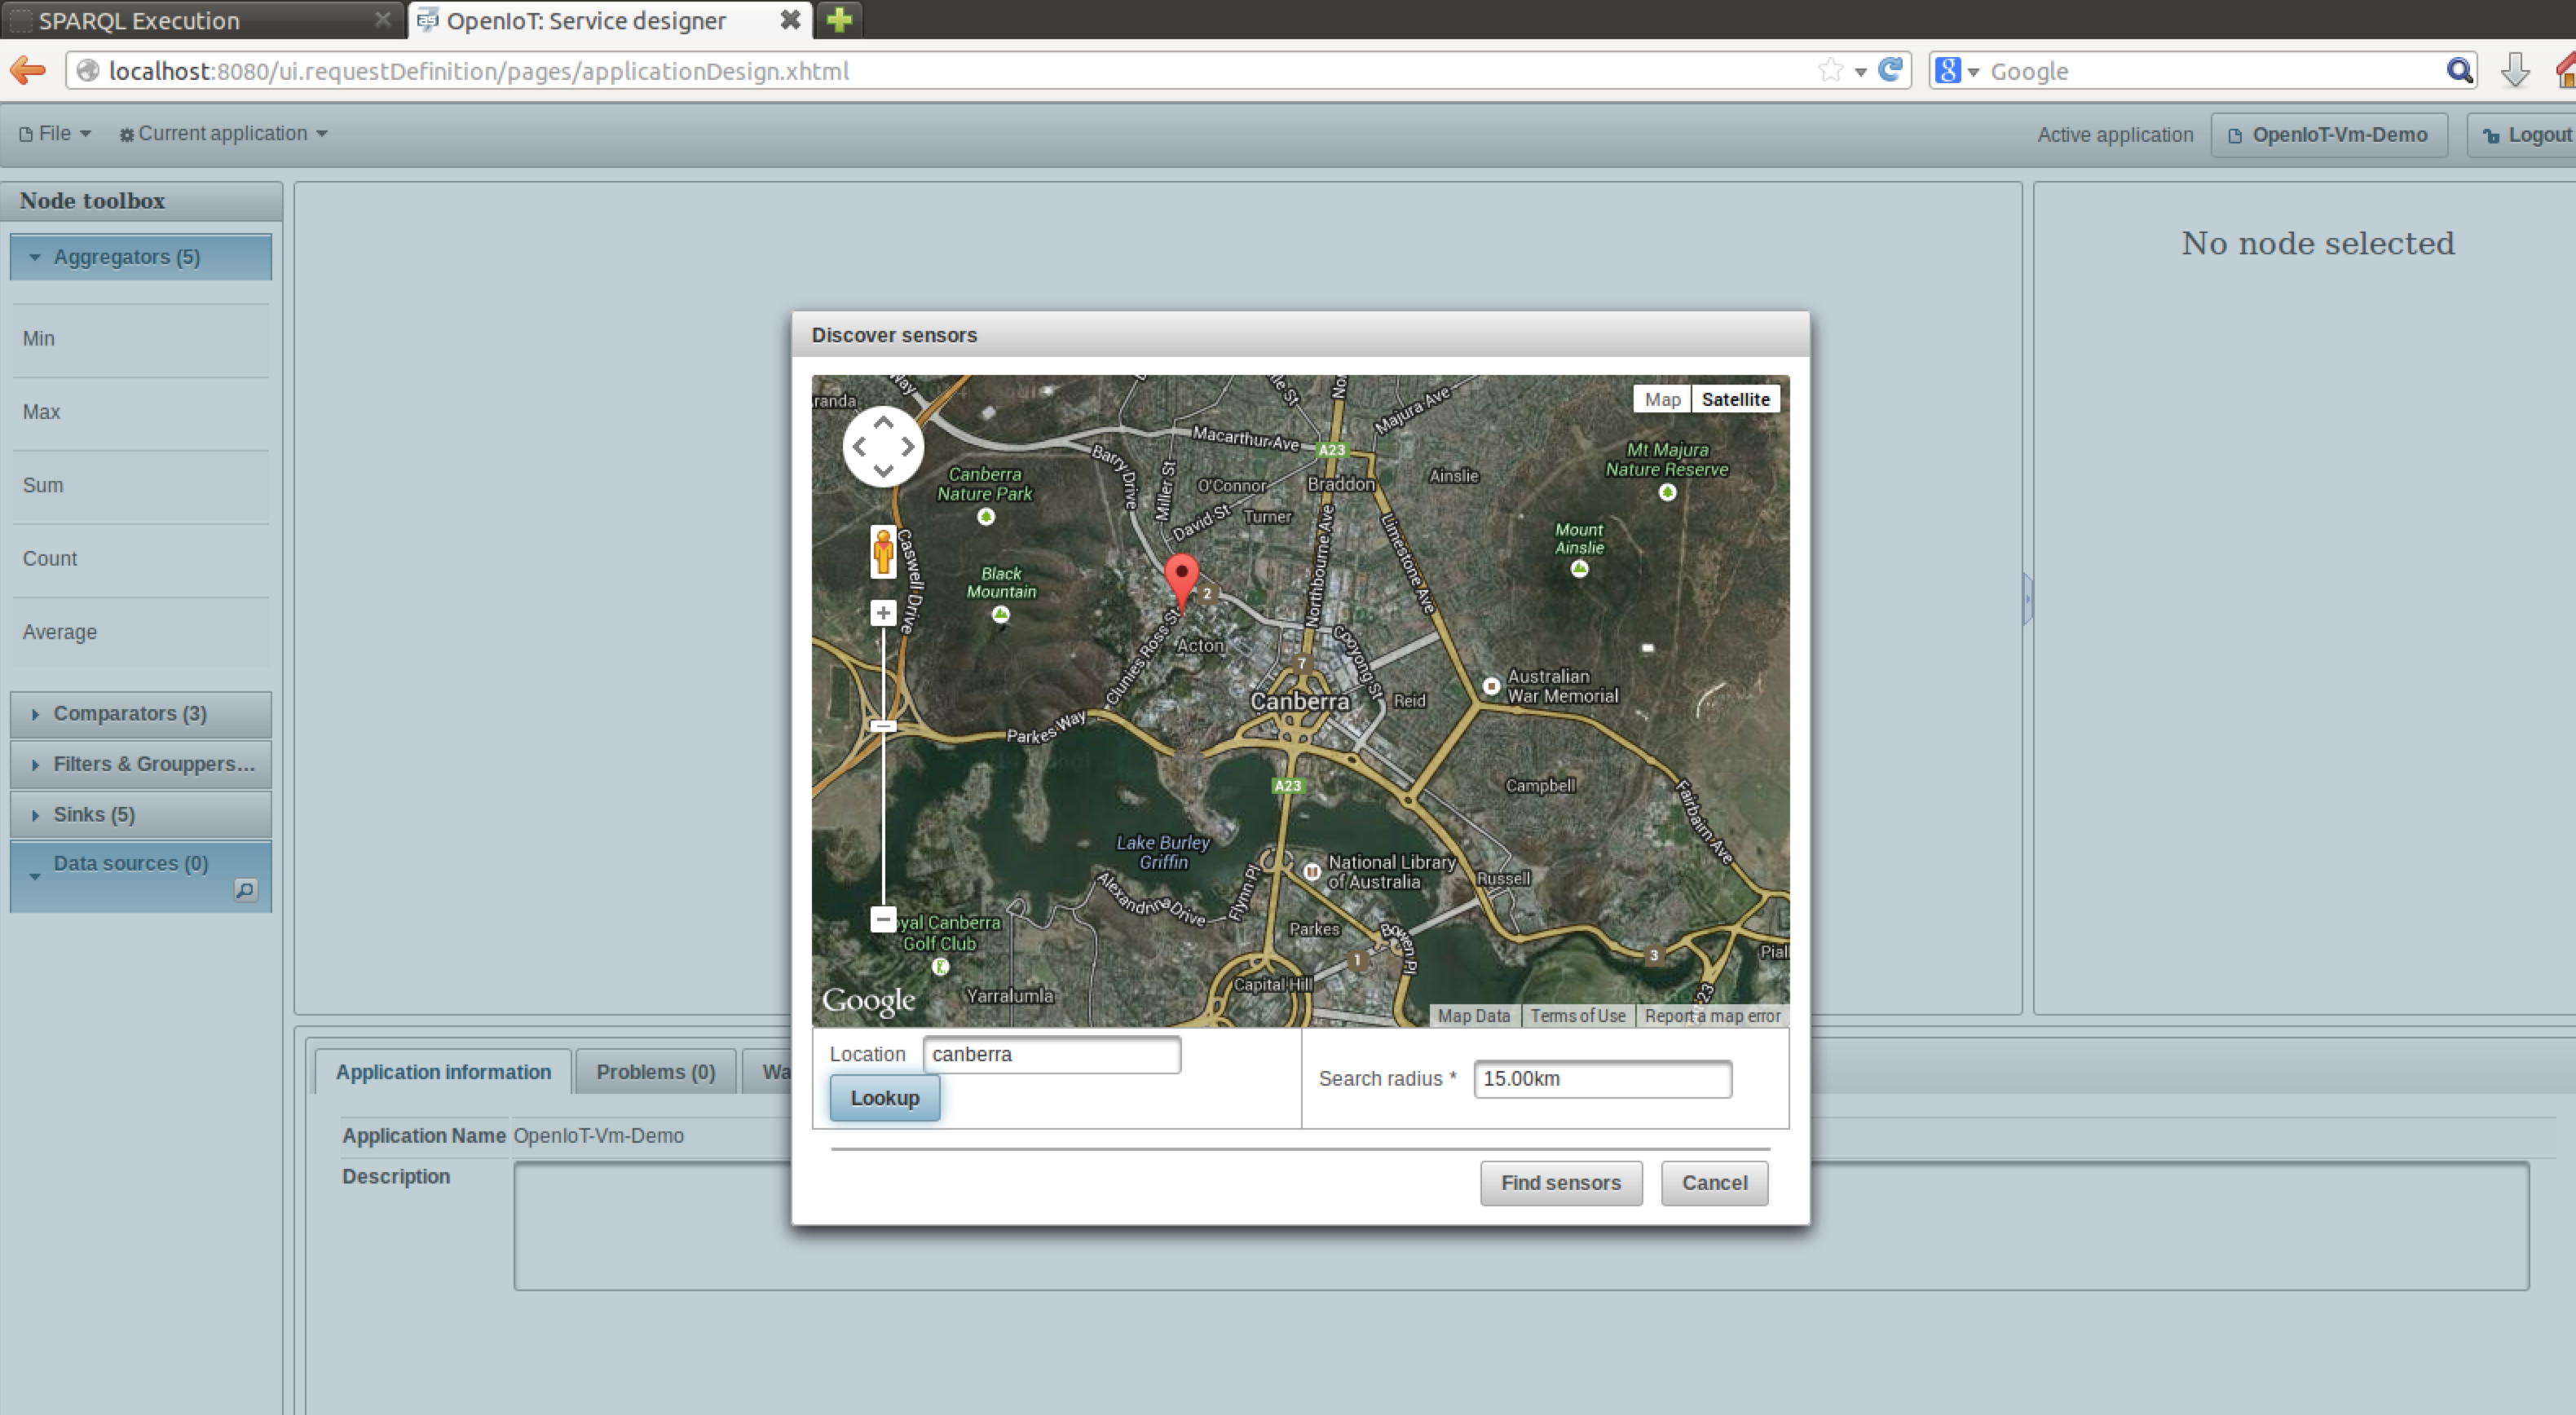
- For local setup, discover sensors in the location
canberra - For DERI setup, discover sensors in the location
Lausanne - See figure below for example
- Use above documentation to compose and save an application. A sample screenshot of one such application is show below
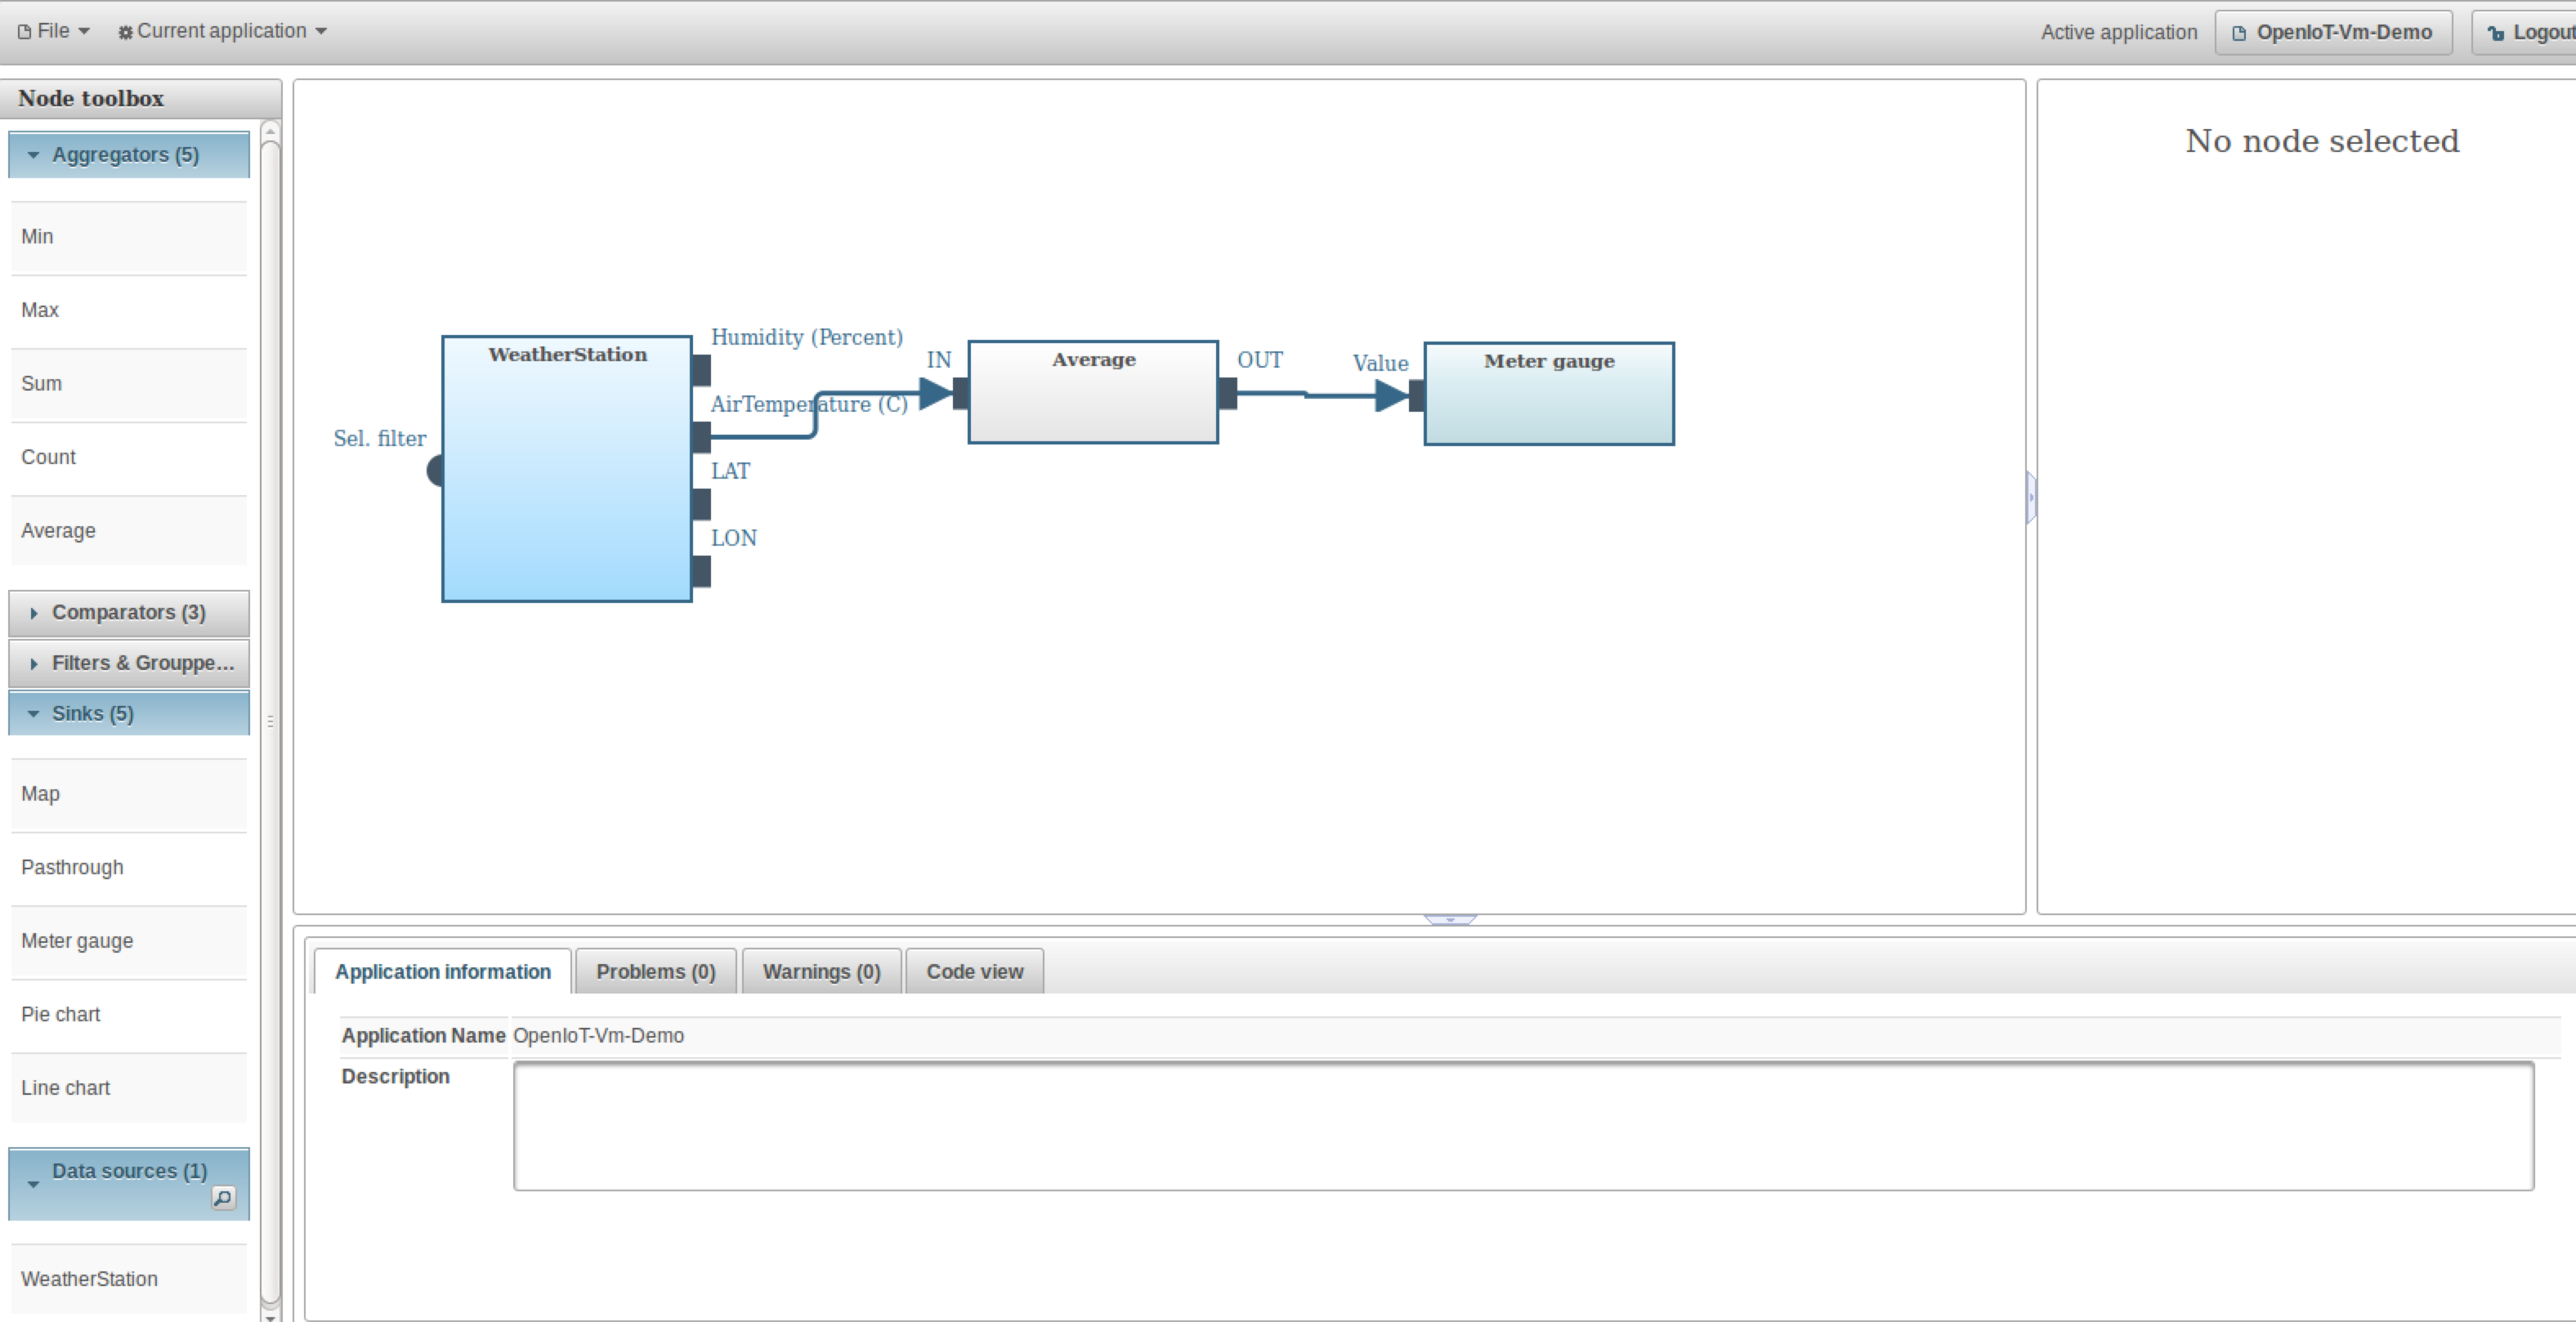
- In the above example, we compose a application that computes the average temperature in canberra and visualises the data in a meter gauge.
-
Request Presentation
- Open firefox browser
- Enter the URL `http:\localhost:8080\ui.requestPresentation
- Login with the same account details created in the previous step
- Open the application (same name as one used before)
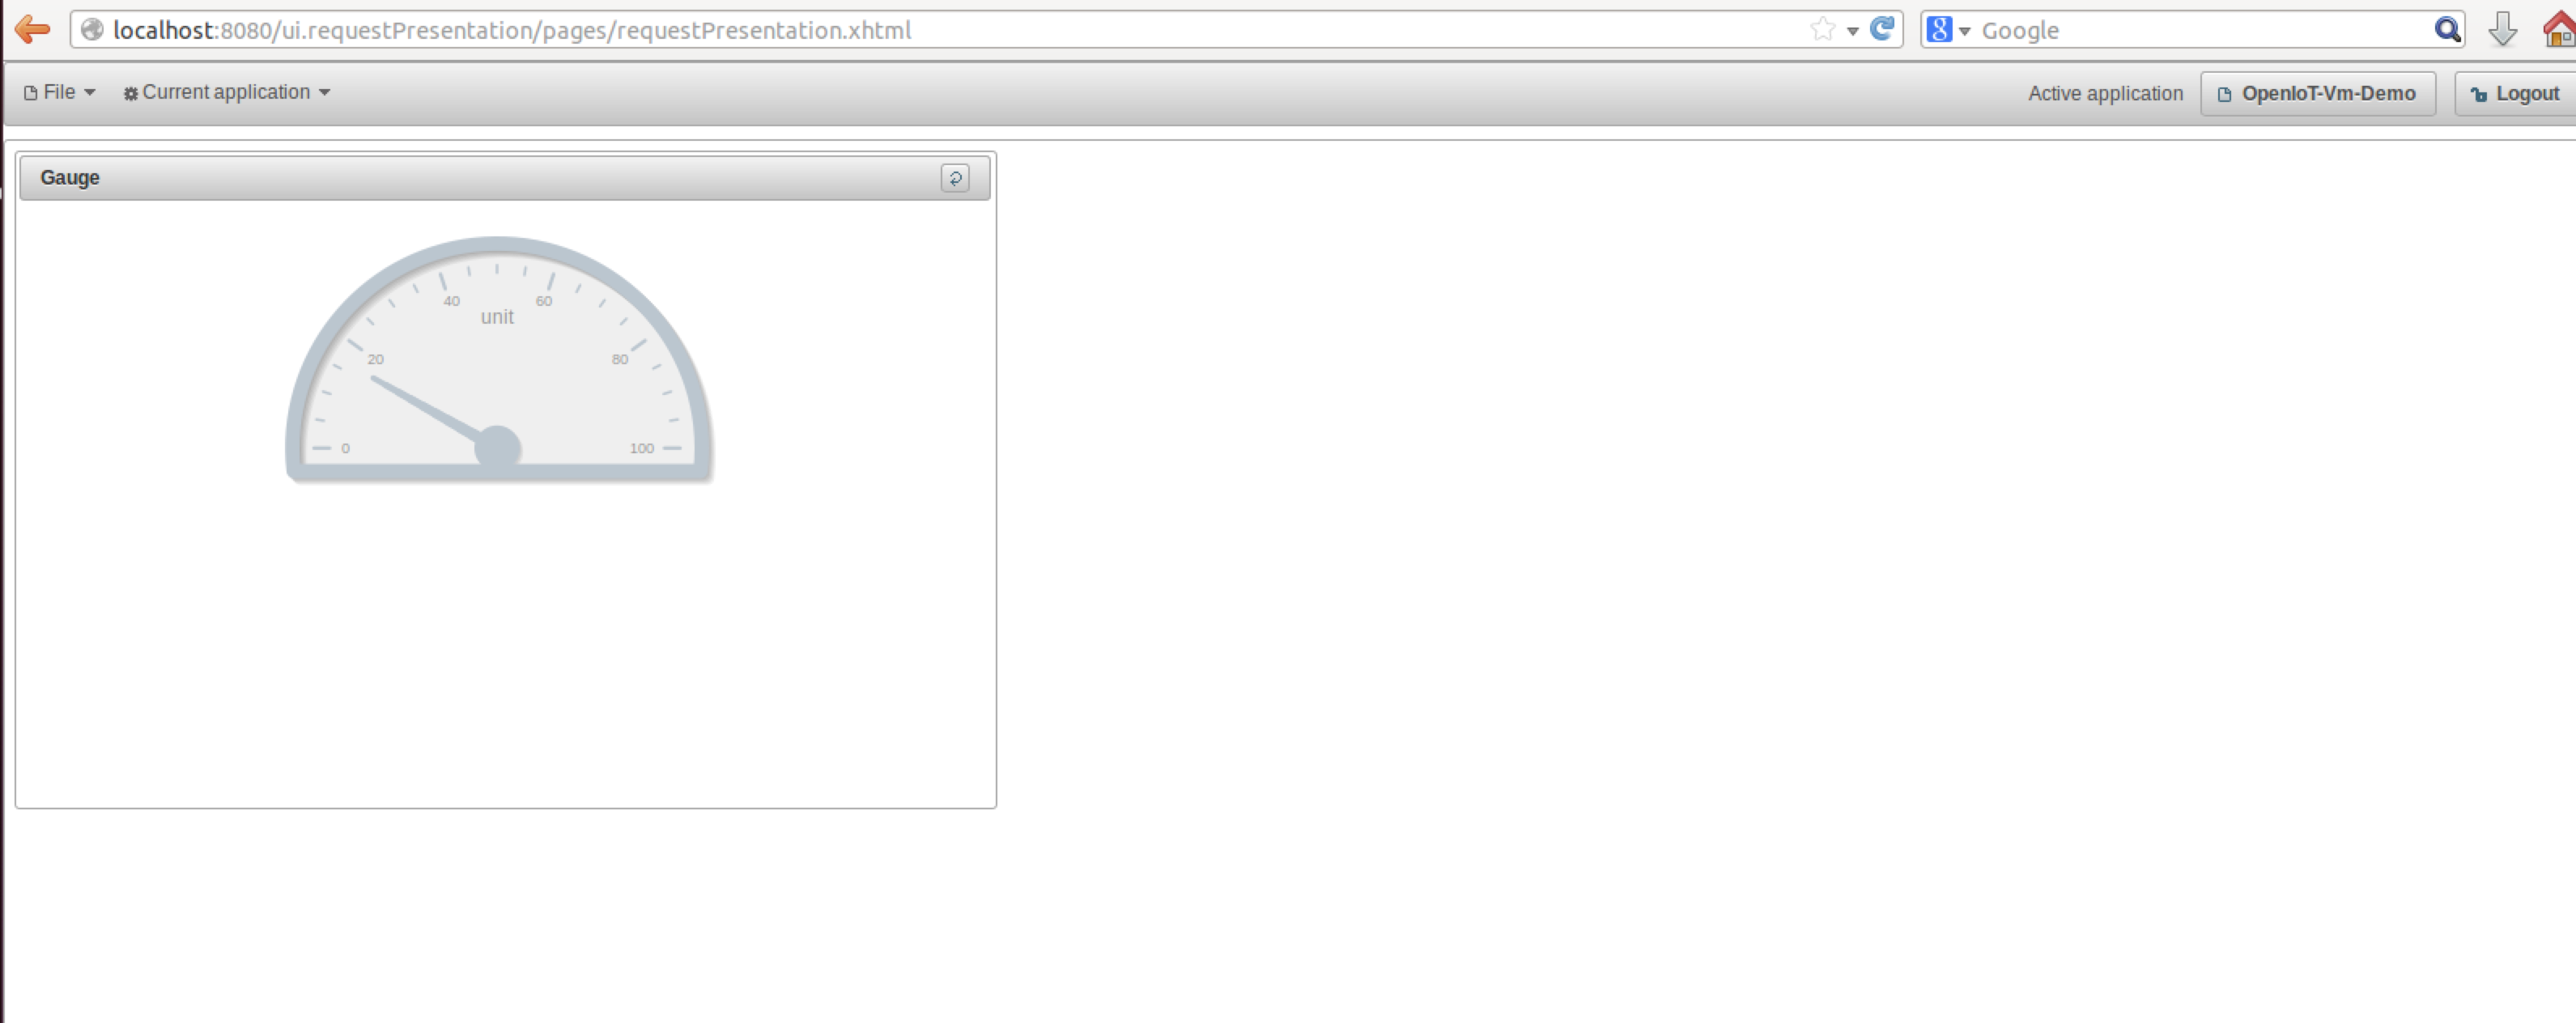
- Click on force dashboard refresh
- You will see the meter gauge with data as below
- Stop all services
- To stop all the services, please run the corresponding stop scripts in the following order
./gsn_stop.sh./jboss_stop.sh./virtuoso_stop.sh
- The VM provide developers, ready access to an Eclipse environment with pre-configured eclipse plugins to support OpenIoT development.
- The user manual can be used to test the system out of the box
- Please refer to the documentation link https://github.com/OpenIotOrg/openiot/wiki/Documentation for detailed manuals on extending/developing new application on OpenIoT platform.
- The VM comes installed with git, maven, JBOSS, Virtuoso, JBOSS and maven plugins for eclipse allowing developer to update their code as and when new release of code is available
- The eclipse environment can be started from the desktop or from
/media/openiot/OpenIoT-Dev-Environment/ - The entire OpenIoT dependencies including JBOSS and latest git code is available from
/media/openiot/OpenIoT-Dev-Environment/