TUNet: A Block-online Bandwidth Extension Model based on Transformers and Self-supervised Pretraining - ICASSP 2022
This code is available for academic research only. If you use our software, please cite as below. For commercial applications, please contact [email protected].
Copyright © 2021 FPT Software, Inc. All rights reserved.
@inproceedings{Nguyen_2022,
	doi = {10.1109/icassp43922.2022.9747699},
	url = {https://doi.org/10.1109%2Ficassp43922.2022.9747699},
	year = 2022,
	month = {may},
	publisher = {{IEEE}},
	author = {Viet-Anh Nguyen and Anh H. T. Nguyen and Andy W. H. Khong},
	title = {{TUNet}: A Block-Online Bandwidth Extension Model Based On Transformers And Self-Supervised Pretraining},
	booktitle = {{ICASSP} 2022 - 2022 {IEEE} International Conference on Acoustics, Speech and Signal Processing ({ICASSP})}
}
Our model achieved a significant gain over baselines. Here, we include the predicted mean-opion-score (MOS) using Microsoft's DNSMOS Azure service. Please refer to our paper for more benchmarks.
| Model | DNSMOS |
|---|---|
| Input | 3.0951 |
| TFiLM-UNet | 3.1026 |
| WSRGlow | 3.2053 |
| NU-Wave | 3.2760 |
| TUNet | 3.3896 |
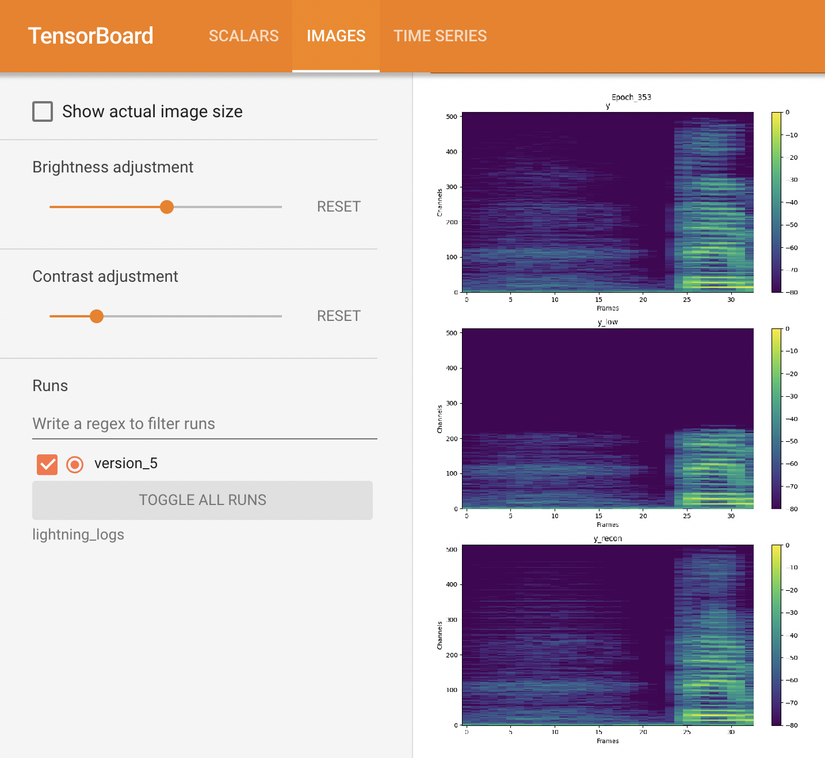
We also provide several audio samples in audio_samples for comparison. In spectrogram visualization, it can be seen that high frequencies generated by our models are more accurate than the baselines.
$ git clone https://github.com/NXTProduct/TUNet.git
$ cd TUNet
-
Our implementation requires the
libsndfileandlibsampleratelibraries for the Python packagessoundfileandsamplerate, respectively. On Ubuntu, they can be easily installed usingapt-get:$ apt-get update && apt-get install libsndfile-dev libsamplerate-dev -
Create a Python 3.8 environment. Conda is recommended:
$ conda create -n tunet python=3.8 $ conda activate tunet -
Install the requirements:
$ pip install -r requirements.txt -f https://download.pytorch.org/whl/cu113/torch_stable.html
Note: the argument -f https://download.pytorch.org/whl/cu113/torch_stable.html is provided to
install torch==1.10.0+cu113 (Pytorch 1.10, CUDA 11.3) inside the requirements.txt . Choose an appropriate CUDA
version to your GPUs and change/remove the argument according
to PyTorch documentation
In our paper, we conduct experiments on the VCTK and VIVOS datasets. You may use either one or both.
-
Download and extract the datasets:
$ wget http://www.udialogue.org/download/VCTK-Corpus.tar.gz -O data/vctk/VCTK-Corpus.tar.gz
$ wget https://ailab.hcmus.edu.vn/assets/vivos.tar.gz -O data/vivos/vivos.tar.gz
$ tar -zxvf data/vctk/VCTK-Corpus.tar.gz -C data/vctk/ --strip-components=1
$ tar -zxvf data/vivos/vivos.tar.gz -C data/vivos/ --strip-components=1
After extracting the datasets, your
./datadirectory should look like this:. |--data |--vctk |--wav48 |--p225 |--p225_001.wav ... |--train.txt |--test.txt |--vivos |--train |--waves |--VIVOSSPK01 |--VIVOSSPK12_R001.wav ... |--test |--waves |--VIVOSDEV01 |--VIVOSDEV01_R001.wav ... |--train.txt |--test.txt -
In order to load the datasets, text files that contain training and testing audio paths are required. We have prepared
train.txtandtest.txtfiles in./data/vctkand./data/vivosdirectories.
config.py is the most important file. Here, you can find all the configurations related to experiment setups,
datasets, models, training, testing, etc. Although the config file has been explained thoroughly, we recommend reading
our paper to fully understand each parameter.
-
Adjust training hyperparameters in
config.pyNote:
batch_sizein this implementation is different from the batch size in the paper. Specifically, we infer " batch size" in our paper as the number of frames per batch, whereas in this repo,batch_sizeis the number of ** audio files** per batch. The DataLoader loads batches of audio files then chunks into frames on the fly. Since audio duration is variable, the number of frames per batch varies around 12*batch_size. -
Run
main.py:$ python main.py --mode train -
Each run will create a version in
./lightning_logs, where the model checkpoint and hyperparameters are saved. In case you want to continue training from one of these versions, just set the argument--versionof the above command to your desired version number. For example:# resume from version 5 $ python main.py --mode train --version 5 -
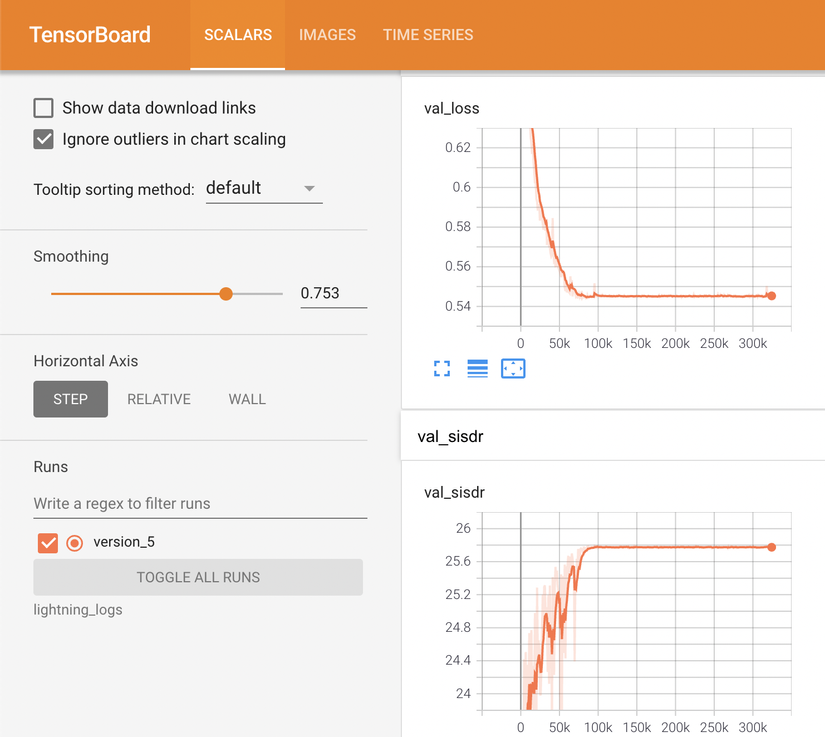
To monitor the training curves as well as inspect model output visualization, run the tensorboard:
$ tensorboard --logdir=./lightning_logs --bind_all
- Modify
config.pyto change evaluation setup if necessary. - Run
main.pywith a version number to be evaluated:This will give the mean and standard deviation of LSD, LSD-HF, and SI-SDR, respectively. During the evaluation, several output samples are saved to$ python main.py --mode eval --version 5CONFIG.LOG.sample_pathfor sanity testing.
Our implementation currently works with the VCTK and VIVOS datasets but can be easily extensible to a new one.
- Firstly, you need to prepare
train.txtandtest.txt. See./data/vivos/train.txtand./data/vivos/test.txtfor example. - Secondly, add a new dictionary to
CONFIG.DATA.data_dir:Important: Make sure each line in{ 'root': 'path/to/data/directory', 'train': 'path/to/train.txt', 'test': 'path/to/test.txt' }train.txtandtest.txtjoining with'root'is a valid path to its corresponding audio file.
-
In order to generate output audios, you need to either put your input samples into
./test_samplesor modifyCONFIG.TEST.in_dirto your input directory. -
Run
main.py:python main.py --mode test --version 5The generated audios are saved to
CONFIG.TEST.out_dir.Note: checkpoint
version_5has only been trained for a few epochs for demonstration purposes. Since the code has been refactored, the checkpoint we used in the paper could not be loaded. To inference with our best checkpoint, please use the ONNX model instead.We provide ONNX inferencing scripts and the best ONNX model (converted from the best checkpoint) at
lightning_logs/best_model.onnx.- Convert a checkpoint to an ONNX model:
The converted ONNX model will be saved to
python main.py --mode onnx --version 5lightning_logs/version_5/checkpoints. - Put test audios in
test_samplesand inference with the converted ONNX model (seeinference_onnx.pyfor more details):python inference_onnx.py
- Convert a checkpoint to an ONNX model:
We thank FPT Software for funding and providing GPU infrastructure. We also thank Microsoft for giving access to the DNSMOS Azure service.


