Extension that allows interfacing 3D Slicer with Arudino. The main module is ArduinoConnect, but several side extensions were developed for specific tasks.
Paolo Zaffino (Universita’ degli Studi “Magna Græcia” di Catanzaro, Italy)
Maria Francesca Spadea (Universita’ degli Studi “Magna Græcia” di Catanzaro, Italy)
Domenico Leuzzi (Universita’ degli Studi “Magna Græcia” di Catanzaro, Italy) Virgilio Sabatino (Universita’ degli Studi “Magna Græcia” di Catanzaro, Italy)
If you use SlicerArduino, please cite the following article:
Zaffino P, Merola A, Leuzzi D, Sabatino V, Cosentino C, Spadea MF. SlicerArduino: A Bridge between Medical Imaging Platform and Microcontroller. Bioengineering. 2020 Sep;7(3):109.
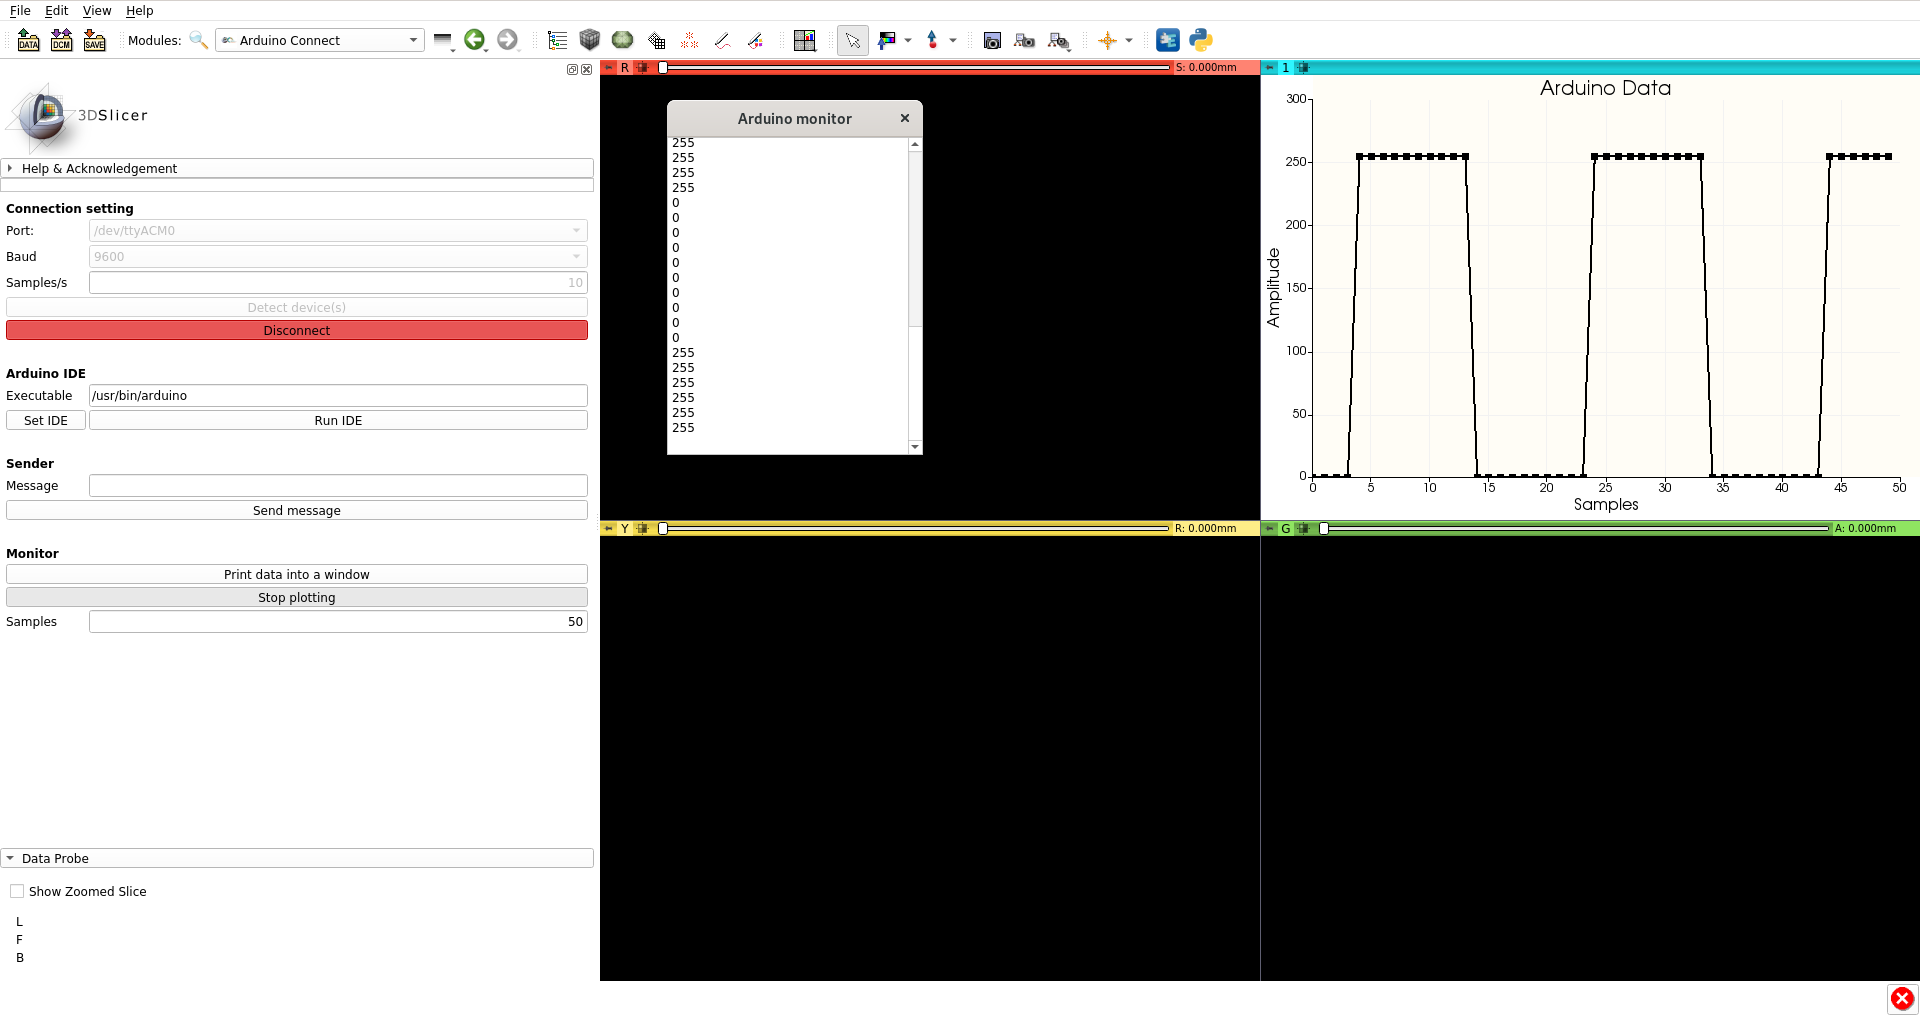
Module for 3D Slicer that allows connecting and receiving/sending data from/to Arduino boards. Link between Arduino and Slicer can be obtained via serial port (wireless protocol has to come yet). Data can be used to control Slicer (e.g. modifying scene appearance) by means of data coming from externals sensors, or to control external devices on basis of data coming from Slicer.
Give a look at the demo presented at the Virtual Slicer Project Week 2020.
Module for 3D Slicer that allows to control the Slice View through gestures using an inexpensive motion sensor compatible with Arduino.
Here a video demonstration.
(Module Icon made by Freepik from www.flaticon.com)
• Connect PAJ7620 to “Arduino”. To do this simply connect:
   o	Vin to 3.3 V;

   o	Gnd to Gnd;

   o	SCL to SCL;

   o	SDA to SDA.
• Connect “Arduino” to the USB port of pc and and run “paj7620_9gestures” code on “arduino IDE”.
o The code can be found here: “https://github.com/Seeed-Studio/Gesture_PAJ7620”.
• Connect “Arduino” to “3D Slicer” using “Slicer Arduino Controller” extension.
• On “ArduinoMotionSensor” extension in “3D Slicer”, choose the desidered offset variation and press “Start Motion” button.
• Use the gestures for controlling view settings (see gesture guide below).
“Left” = Select Previous View
“Right” = Select Next View
“Up” = Increase Offset
“Down” = Decrease Offset
“Forward” = Enable Full Screen
“Backward” = Disable Full Screen
Module for 3D Slicer that allows to control the Slice View through a pedealboard connected via Arduino.
Here a video demonstration.
(Module Icon made by Freepik from www.flaticon.com)
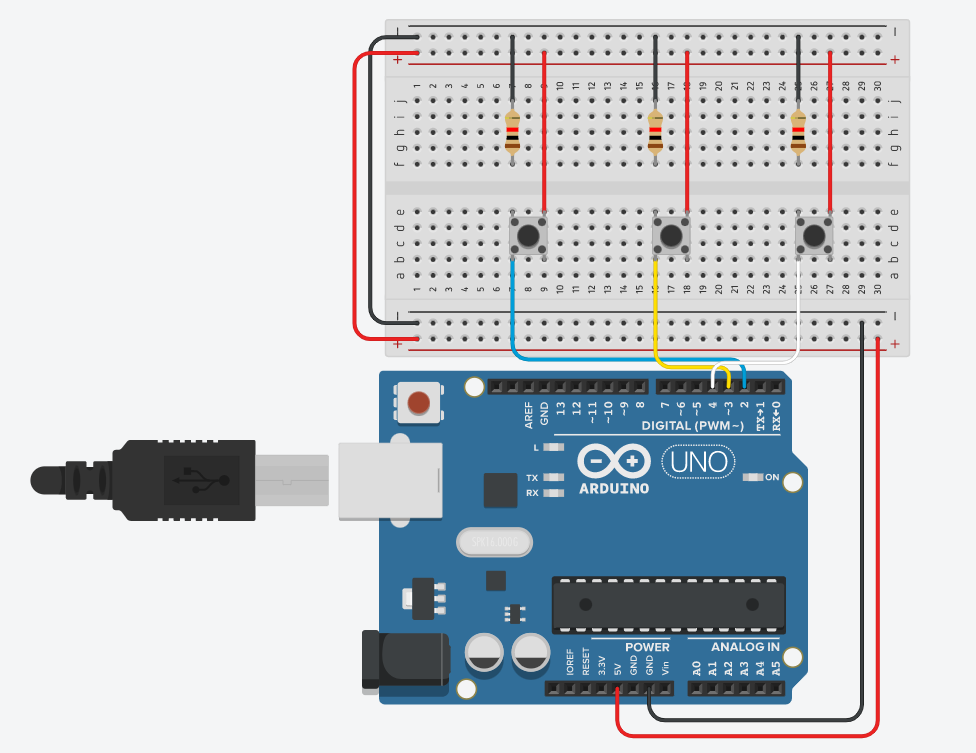
• Connect buttons to Arduino as described in the figure below:

• Load in Arduino board the code hosted into the folder "ArduinoCode/ArduinoPedalboard".
• Connect “Arduino” to “3D Slicer” using “Slicer Arduino Controller” extension.
• On “ArduinoPedalBoard” extension in “3D Slicer”, choose the desidered tasks and offset variation and press “Start” button.
• Use the pedalboard for controlling view settings.
