   vue init webpack zui
   npm install
项目结构如下:
├─document  // 文档目录
│  │  App.vue //主页文件
│  │  main.js //文档项目入口文件
│  │
│  ├─pages // 文档书写markdown文件夹
│  │
│  ├─compoents // 文档平台用到的组件
│  ├─style // 文档相关样式文件夹
│  └─router
│          index.js //路由配置文件
│
├─src // 用于编写存放组件
│  │  index.js  //组件集成统一访问文件配置
│  │
│  ├─components  //组件文件夹
│目录调整后,我们需要修改入口配置,才能正常启动项目。详细vue.config.js配置参数可以参考官方文档
- 新建
vue.config.js文件 - 修改入口配置
// 入口配置
let page = {
  // 文档入口
  index: {
    entry: 'document/main.js',
    template: 'public/index.html',
    filename: 'index.html',
    chunks: ['chunk-vendors', 'chunk-common', 'index']
  }
}
module.exports = {
  pages: page,
}- 从一个简单的button组件开始,在
src/components下新建button.vue
<template>
    <div
    :class="[
    'kis-button',
    `kis-button-${type}`
    ]">
        <slot></slot>
    </div>
</template>
<script>
export default {
    name: 'KisButton',
    props: {
        type: {
            type: String,
            default: 'primary'
        }
    }
}
</script>
<style>
.kis-button {
  display: inline-block;
  border-radius: 4px;
  height: 14px;
  line-height: 14px;
  color: #fff;
  padding: 10px 19px;
  cursor: pointer;
  white-space: nowrap;
  margin-right: 4px;
}
.kis-button-primary {
    background-color: #409eff;
    border-color: #409eff;
}
.kis-button-success {
    background-color: #67c23a;
    border-color: #67c23a;
}
.kis-button-danger {
    background-color: #f56c6c;
    border-color: #f56c6c;
}
.kis-button-warning {
    background-color: #e6a23c;
    border-color: #e6a23c;
}
</style>- 在
index.js文件中注册并导出所有组件
import KisButton from './components/kis-button.vue'

const components = [
  KisButton
]

const install = function (Vue) {
  components.map(component => {
    Vue.component(component.name, component);
  });
}

export default {
  install,
  ...components
};- 在其他项目引入组件方式: 编辑
main.js文件
import ZUI from '../src/index'
Vue.use(ZUI)开发完第一个组件后,我们需要开始编写markdown文档。
- 引入
vue-markdown-loader组件将markdown文档解析为vue文件
npm install vue-markdown-loader --save-dev
npm install markdown-it markdown-it-container --save-dev
- 在
document/components下开发一个用于显示代码块的组件demo-block
<template>
  <div class="demo-block">
    <div class="demo-block-source">
      <slot name="source"></slot>
      <span class="demo-block-code-icon"
        v-if="!$slots.default"
        @click="showCode=!showCode"><img alt="expand code"
          src="https://gw.alipayobjects.com/zos/rmsportal/wSAkBuJFbdxsosKKpqyq.svg"
          class="code-expand-icon-show"></span>
    </div>
    <div class="demo-block-meta"
      v-if="$slots.default">
      <slot></slot>
      <span v-if="$slots.default"
        class="demo-block-code-icon"
        @click="showCode=!showCode"><img alt="expand code"
          src="https://gw.alipayobjects.com/zos/rmsportal/wSAkBuJFbdxsosKKpqyq.svg"
          class="code-expand-icon-show"></span>
    </div>
    <div class="demo-block-code"
      v-show="showCode">
      <slot name="highlight"></slot>
    </div>
  </div>
</template>
<script type="text/babel">

export default {
  data() {
    return {
      showCode: false
    };
  }
};
</script>
<style>
.demo-block {
  border: 1px solid #ebedf0;
  border-radius: 2px;
  display: inline-block;
  width: 100%;
  position: relative;
  margin: 0 0 16px;
  -webkit-transition: all 0.2s;
  transition: all 0.2s;
  border-radius: 2px;
}
.demo-block p {
  padding: 0;
  margin: 0;
}
.demo-block .demo-block-code-icon {
  position: absolute;
  right: 16px;
  bottom: 14px;
  cursor: pointer;
  width: 18px;
  height: 18px;
  line-height: 18px;
  text-align: center;
}
.demo-block .demo-block-code-icon img {
  -webkit-transition: all 0.4s;
  transition: all 0.4s;
  -webkit-user-select: none;
  -moz-user-select: none;
  -ms-user-select: none;
  user-select: none;
  position: absolute;
  left: 0;
  top: 0;
  margin: 0;
  max-width: 100%;
  width: 100%;
  vertical-align: baseline;
  -webkit-box-shadow: none;
  box-shadow: none;
}
.demo-block .demo-block-source {
  border-bottom: 1px solid #ebedf0;
  padding: 20px 24px 20px;
  color: #444;
  position: relative;
  margin-bottom: -1px;
}
.demo-block .demo-block-meta {
  position: relative;
  padding: 12px 50px 12px 20px;
  border-radius: 0 0 2px 2px;
  -webkit-transition: background-color 0.4s;
  transition: background-color 0.4s;
  width: 100%;
  -webkit-box-sizing: border-box;
  box-sizing: border-box;
  font-size: 14px;
  color: #444;
  font-size: 14px;
  line-height: 2;
  border-radius: 0;
  border-bottom: 1px dashed #ebedf0;
  margin-bottom: -1px;
}
.demo-block .demo-block-meta code {
  color: #444;
  background-color: #e6effb;
  margin: 0 4px;
  display: inline-block;
  padding: 3px 7px;
  border-radius: 3px;
  height: 18px;
  line-height: 18px;
  font-family: Menlo, Monaco, Consolas, Courier, monospace;
  font-size: 14px;
}
.demo-block .demo-block-code {
  background-color: #f7f7f7;
  font-size: 0;
}
.demo-block .demo-block-code code {
  background-color: #f7f7f7;
  font-family: Consolas, Menlo, Courier, monospace;
  border: none;
  display: block;
  font-size: 14px;
  padding: 16px 32px;
}
.demo-block .demo-block-code pre {
  margin: 0;
  padding: 0;
}
.sh-checkbox {
  color: #444;
  font-weight: 500;
  font-size: 14px;
  position: relative;
  cursor: pointer;
  display: inline-block;
  white-space: nowrap;
  user-select: none;
}
</style>- 在
document/main.js中注册该组件,让每个md文件生成的vue文件都可以调用该组件渲染代码块
import DemoBlock from './components/demo-block.vue'
Vue.component("demo-block", DemoBlock);- 导入
highlight.js代码着色样式
@import "highlight.js/styles/color-brewer.css";
这一步我直接import会报错,但是
node_modules里面有这个文件,于是我直接复制到document/style/highjs.css文件中在document/App.vue中导入的
- 对
markdown文件做进一步样式优化,在document/style下新建md.css
.markdown h1 {
  color: #0d1a26;
  font-weight: 500;
  margin-bottom: 20px;
  margin-top: 8px;
  font-size: 30px;
  line-height: 38px;
}
.markdown h2,
.markdown h3,
.markdown h4,
.markdown h5,
.markdown h6 {
  font-family: Lato;
  margin: 1.6em 0 0.6em;
  font-weight: 500;
  clear: both;
}
.markdown h3 {
  font-size: 18px;
}
.markdown h4 {
  font-size: 16px;
}
.markdown h5 {
  font-size: 14px;
}
.markdown h6 {
  font-size: 12px;
}
.markdown p,
.markdown pre {
  font-size: 14px;
  color: #5e6d82;
  line-height: 1.5em;
  background-color: #f2f4f5;
}
.markdown ul > li > p,
.markdown ol > li > p {
  margin: 0.2em 0;
}
.markdown ul {
  padding: 0;
  margin: 0;
}
.markdown ul > li {
  list-style-type: circle;
  margin-left: 20px;
  padding-left: 4px;
  padding-top: 15px;
}
.markdown ol > li {
  list-style-type: decimal;
  margin-left: 20px;
  padding-left: 4px;
  padding-top: 15px;
}
.markdown > table {
  border-collapse: collapse;
  border-spacing: 0;
  empty-cells: show;
  border: 1px solid #ebedf0;
  width: 100%;
  margin: 8px 0 16px;
}
.markdown > table th,
.markdown > table td {
  color: #314659;
  border: 1px solid #ebedf0;
  text-align: left;
  padding: 10px 15px;
}
.markdown > table th {
  white-space: nowrap;
  color: #5c6b77;
  font-weight: 500;
  background: rgba(0, 0, 0, 0.02);
}
.markdown strong,
.markdown b {
  font-weight: 500;
}
.markdown .sh-markdown-permalink {
  opacity: 0;
}
.markdown h1:hover .sh-markdown-permalink,
.markdown h2:hover .sh-markdown-permalink,
.markdown h3:hover .sh-markdown-permalink,
.markdown h4:hover .sh-markdown-permalink,
.markdown h5:hover .sh-markdown-permalink,
.markdown h6:hover .sh-markdown-permalink {
  opacity: 1;
  display: inline-block;
}
.markdown > br,
.markdown p > br {
  clear: both;
}
.markdown blockquote {
  font-size: 90%;
  color: #0d1a26;
  border-left: 4px solid #ebedf0;
  padding-left: 0.8em;
  margin: 1em 0;
}
.markdown blockquote p {
  margin: 0;
}
.markdown hr {
  height: 1px;
  border: 0;
  background: #ebedf0;
  clear: both;
}
.markdown code {
  background-color: #f7f7f7;
  display: inline-block;
  font-family: Microsoft YaHei;
  margin: 0 1px;
  background: #f2f4f5;
  padding: 0.2em 0.5em;
  border-radius: 3px;
  font-size: 0.9em;
  border: 1px solid #f7f7f7;
}- 在
vue.config.js文件中配置vue-markdown-loader及解析代码块配置
// markdown 渲染
const markdownRender = require('markdown-it')()
module.exports = {
  pages: page,
  // markdown解析配置
  chainWebpack: config => {
    config.module.rule('md')
      .test(/\.md/)
      .use('vue-loader')
      .loader('vue-loader')
      .end()
      .use('vue-markdown-loader')
      .loader('vue-markdown-loader/lib/markdown-compiler')
      .options({
        raw: true,
        use: [
          [require('markdown-it-container'), 'demo', {
            validate: function (params) {
              return params.trim().match(/^demo\s*(.*)$/)
            },

            render: function (tokens, idx) {
              if (tokens[idx].nesting === 1) {
                // 1.获取第一行的内容使用markdown渲染html作为组件的描述
                let demoInfo = tokens[idx].info.trim().match(/^demo\s+(.*)$/)
                let description = (demoInfo && demoInfo.length > 1) ? demoInfo[1] : ''
                let descriptionHTML = description ? markdownRender.render(description) : ''
                // 2.获取代码块内的html和js代码
                let content = tokens[idx + 1].content

                // 3.使用自定义开发组件【DemoBlock】来包裹内容并且渲染成案例和代码示例
                return `<demo-block>
                <div class="source" slot="source">${content}</div>
                ${descriptionHTML}
                <div class="highlight" slot="highlight">`
              } else {
                return '</div></demo-block>\n'
              }
            }
          }]
        ]
      })
  }
}- 在
document/pages/下新建button.md文件
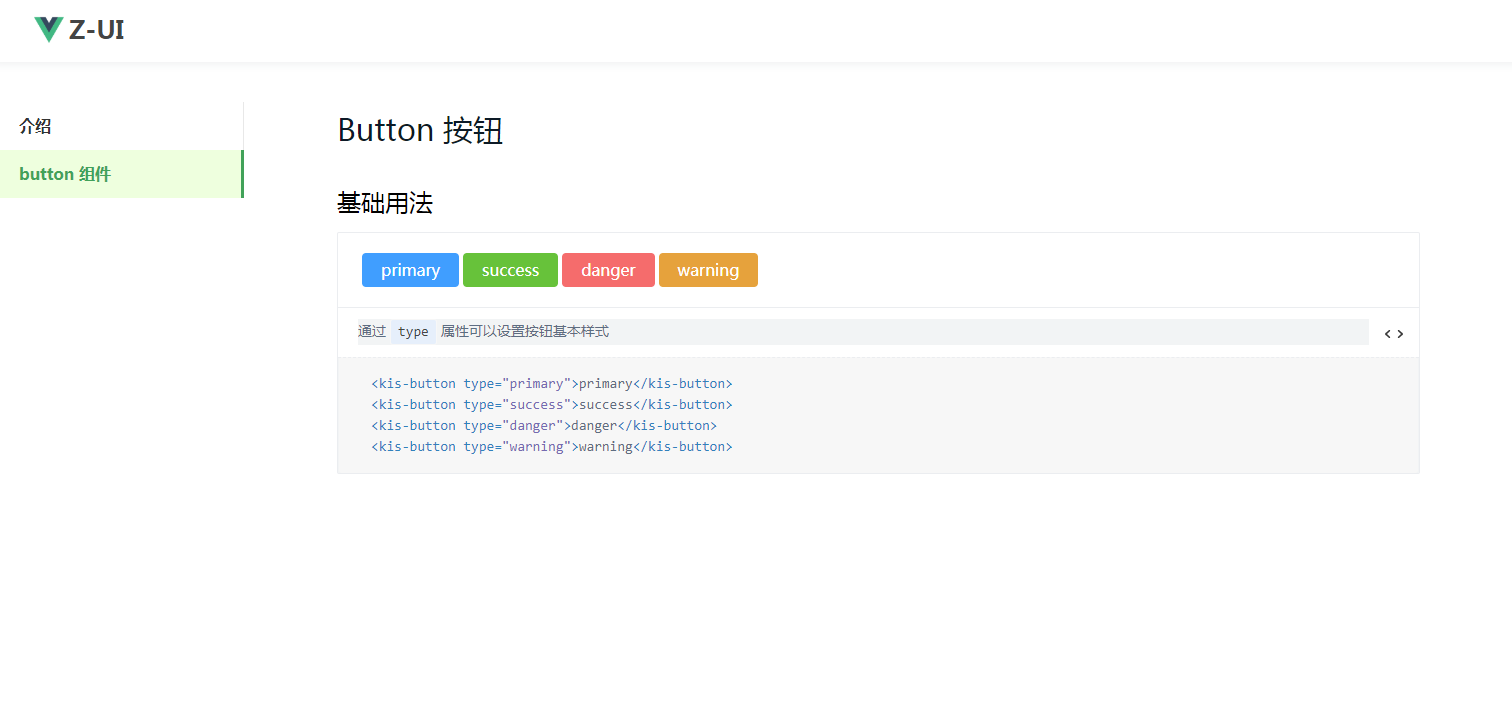
# Button 按钮

## 基础用法

::: demo 通过`type`属性可以设置按钮基本样式

\```html
<kis-button type="primary">primary</kis-button>
<kis-button type="success">success</kis-button>
<kis-button type="danger">danger</kis-button>
<kis-button type="warning">warning</kis-button>
\```
:::
:::用于识别代码块生成实例的标志,第一行为组件描述
- 配置文档路由
import button from '../pages/button.md'
  {
    path: '/button',
    name: 'button',
    component: button
},- 在文档中引入我们写的组件库,以便于代码解析生成组件实例,编辑
document/main.js文件
import KisUI from '../src/index'
Vue.use(KisUI);
这里我参考滴滴cube-ui的做法,继续修改项目。
├─document  // 文档目录
│  │  App.vue //主页文件
│  │  main.js //文档项目入口文件
│  │
│  ├─pages // 文档书写markdown文件夹
│  │
│  ├─compoents // 文档平台用到的组件
│  ├─style // 文档相关样式文件夹
│  └─router
│          index.js //路由配置文件
│
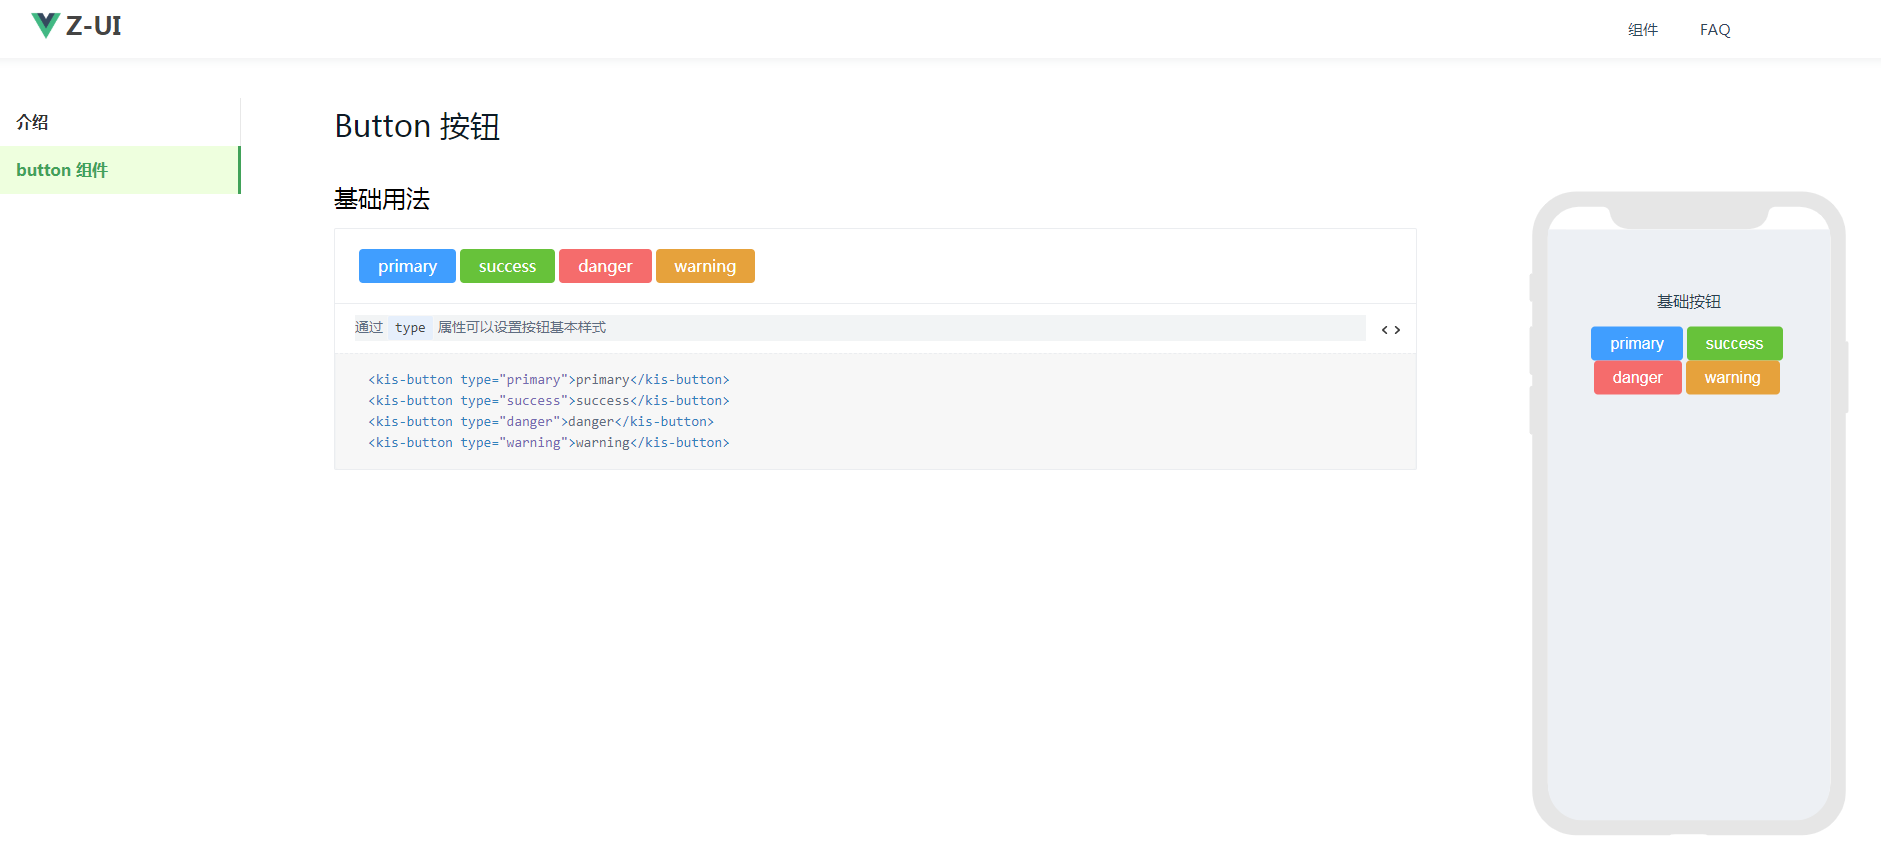
├─example // 组件demo文件夹 引用组件生成的demo页面写在这里,demo页面路由须与document对应组件文档路由相同,这样在文档页面预览框中可以直接显示demo组件页面
│  │  App.vue
│  │  main.js //demo项目入口文件
│  │
│  ├─pages // demo写在这里
│  └─router
│          index.js //路由配置文件
│
├─src // 用于编写存放组件
│  │  index.js  //组件集成统一访问文件配置
│  │
│  ├─components  //组件文件夹
│由于移动端组件需要在pc端使用iframe展示移动端的效果,我们需要为项目新增一个入口,这部分用来演示组件。
// 多入口配置
let page = {
  // 文档入口
  index: {
    entry: 'document/main.js',
    template: 'public/index.html',
    filename: 'index.html',
    chunks: ['chunk-vendors', 'chunk-common', 'index']
  },
  // 组件demo入口
  example: {
    entry: 'example/main.js',
    template: 'public/example.html',
    filename: 'example.html',
    chunks: ['chunk-vendors', 'chunk-common', 'example']
  }
}
module.exports = {
  pages: page
}- 编写display组件
<template>
  <div class="page-display">
    <div class="display-wrapper">
      <section class="mofang-demo">
        <iframe :src="ifrSrc" frameborder="0" width="100%" height="100%" scrolling="no"></iframe>
      </section>
    </div>
  </div>
</template>

<script>
  export default {
    data () {
      return {
        hash: '/',
        baseUrl: '/#/'
      }
    },
    computed: {
      ifrSrc () {
        return `${this.baseUrl}${this.hash}`
      }
    },
    watch: {
      '$route': {
        // eslint-disable-next-line
        handler (to, from) {
          const index = to.path.indexOf('/#/')
          this.hash = to.path.substr(index + 2)
        },
        immediate: true
      }
    }
  }
</script>

<style>
  .page-display {
    position: relative;
  }
  .display-wrapper {
    position: relative;
    width: 330px;
    height: 645px;
    top: 50%;
    transform: translate(0, -50%);
    margin: 0 56px 0 26px;
    /* background: url("./iphoneXs.svg"); */
    background-repeat: no-repeat;
    background-size: cover;
    background-position: top;
  }
  .mofang-demo {
    position: absolute;
    top: 38px;
    left: 23px;
    right: 25px;
    bottom: 16px;
    overflow: hidden;
    border-radius: 0 0 35px 35px;
    border: 1px solid #edf0f4;
    border-top: none;
    background-color: #edf0f4;
  }
  iframe {
    width: 0;
    max-width: 100%;
    min-width: 100%;
  }
</style>- 在
document/main.js中注册该组件
import DemoBlock from './components/demo-block.vue'
Vue.component("demo-block", DemoBlock);- 在
document/App.vue中引入display组件并调整布局

